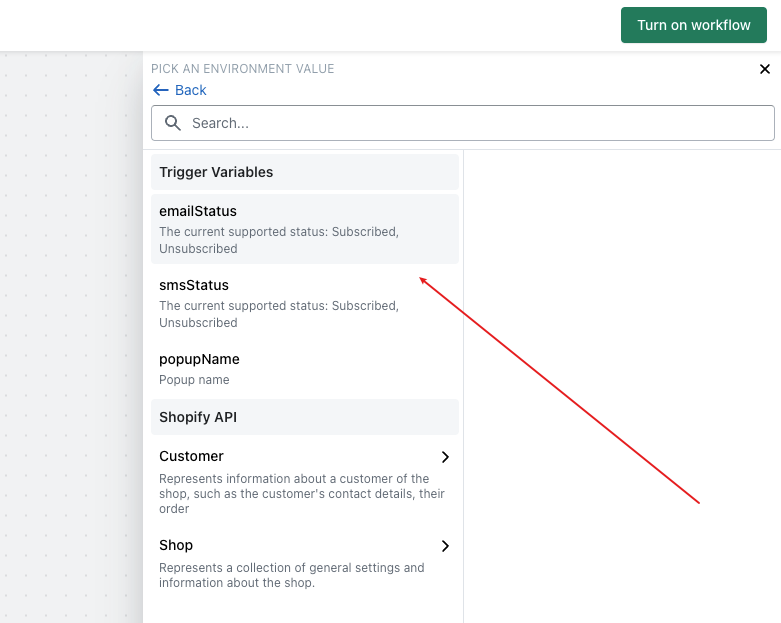
Want to boost your Shopify store’s credibility and grow your business?
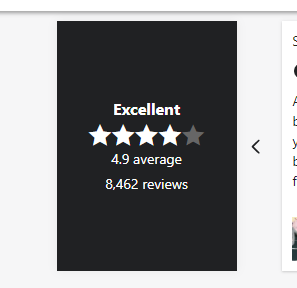
A great deal of customer reviews serves as social proof for Shopify stores both in products and service. The AliExpress platform owns tons of reviews, providing a vast customer base worldwide. If we can import these reviews from AliExpress, our stores would build credibility quickly, giving customers confidence and increasing conversion rates.
With Trustoo, you can import customer reviews in bulk from AliExpress to your Shopify stores and Shopify Plus stores in just a few clicks. 50 reviews at a one-time import! When importing, the Trsustoo app will automatically filter duplicate reviews.
Check the following methods to import reviews from AliExpress.
Method 1: Import via AliExpress URL (Recommend)
Step 1:
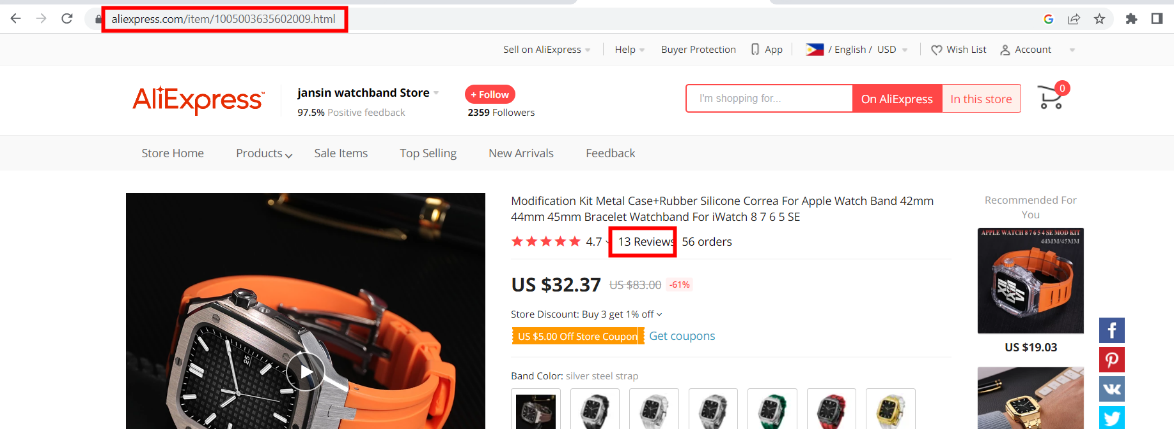
Open the page where you want to import reviews of AliExpress products to your Shopify store, then copy the URL.

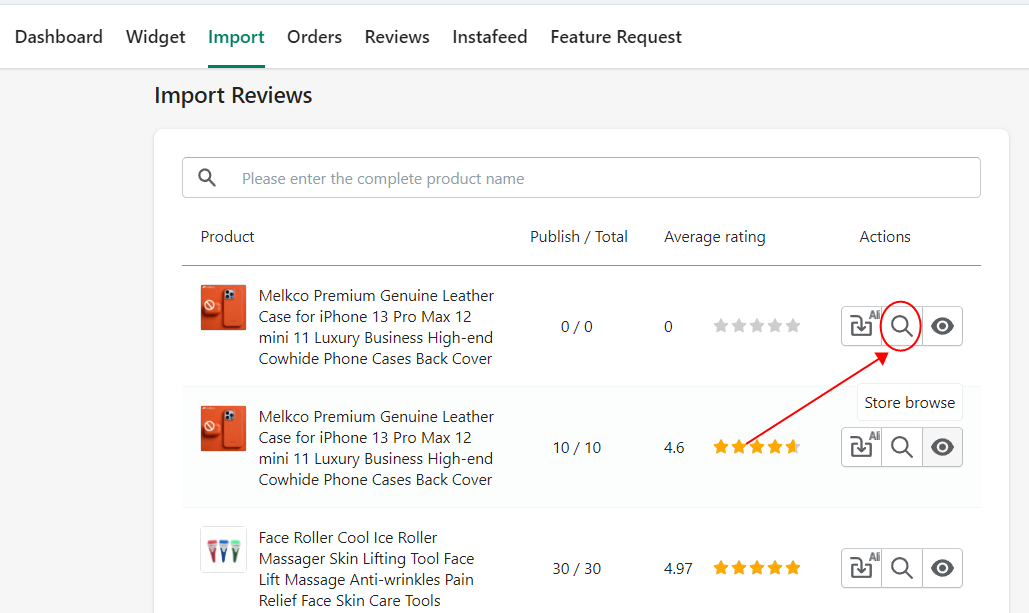
You can also click on the “search icon” and similar product search results will be given. Make sure to only click on AliExpress products.
Step 2:
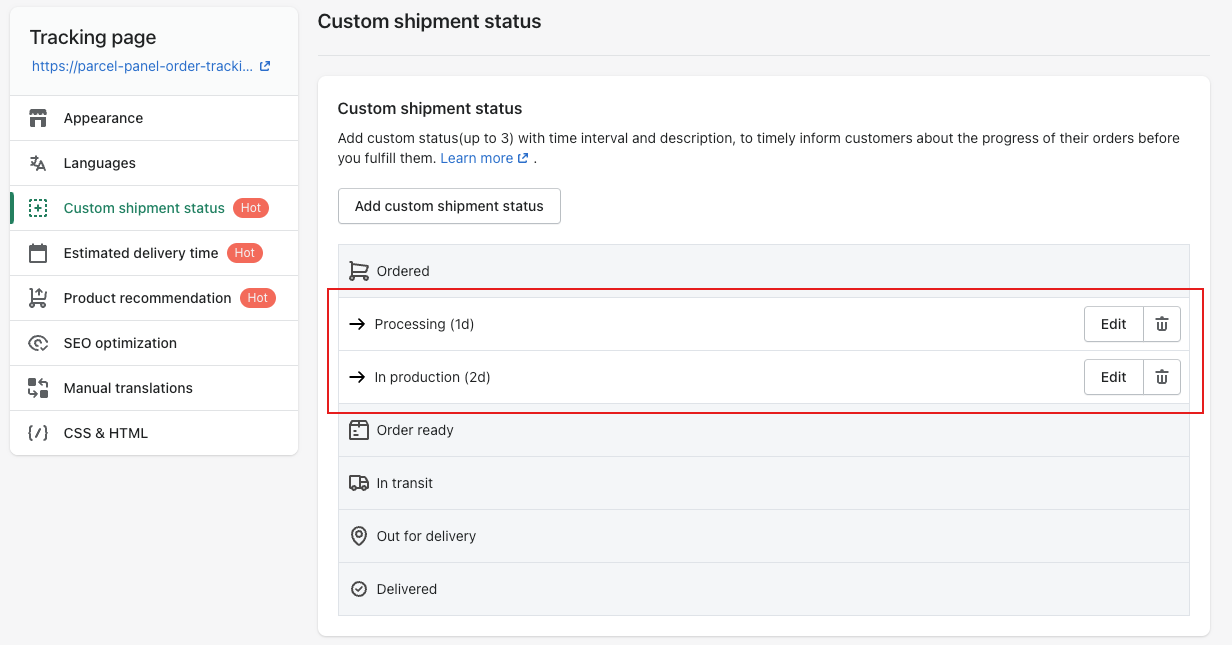
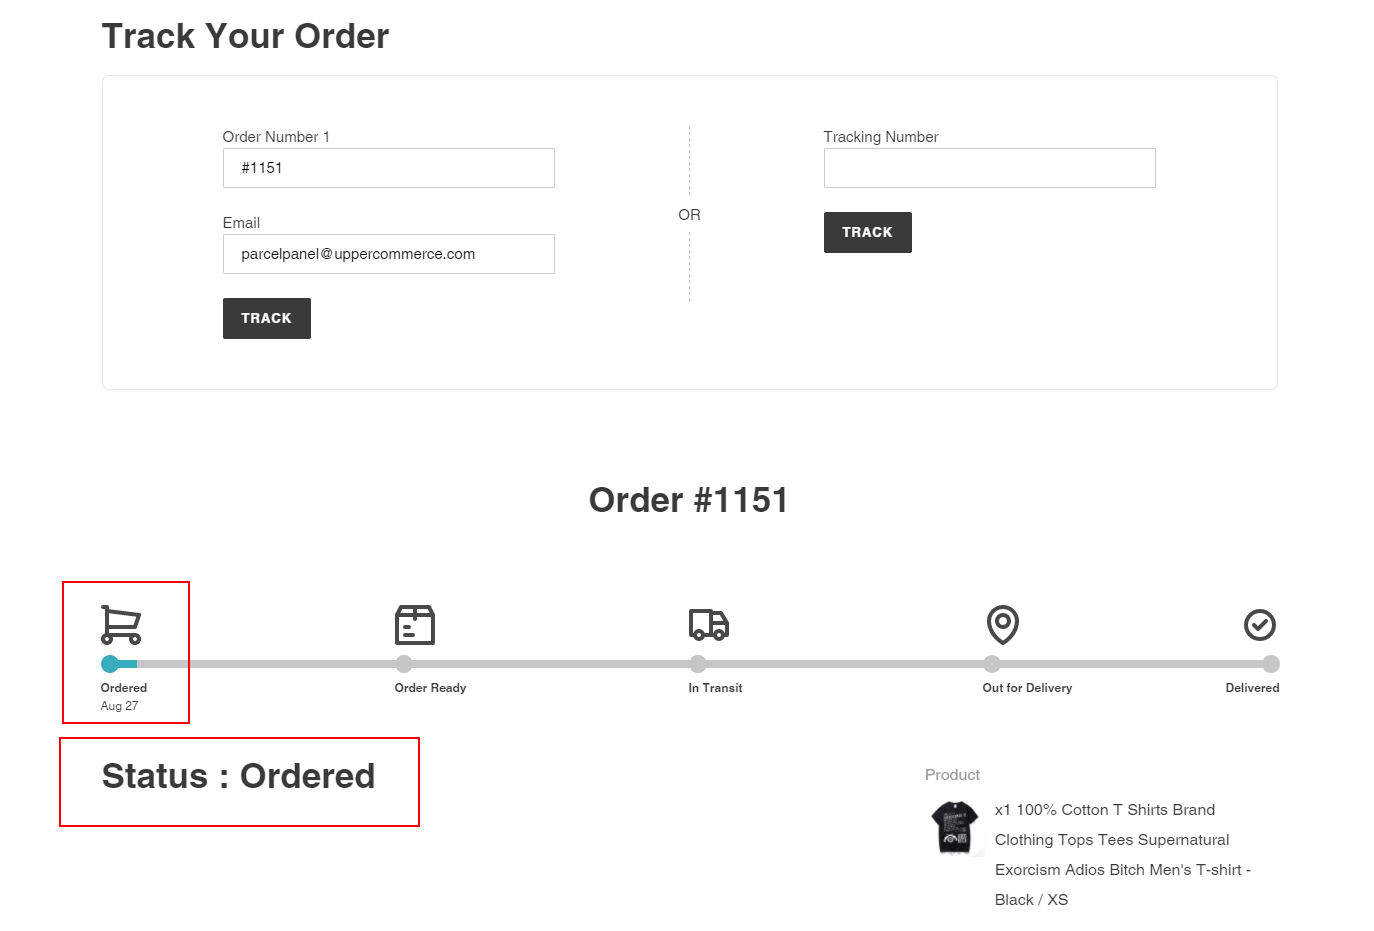
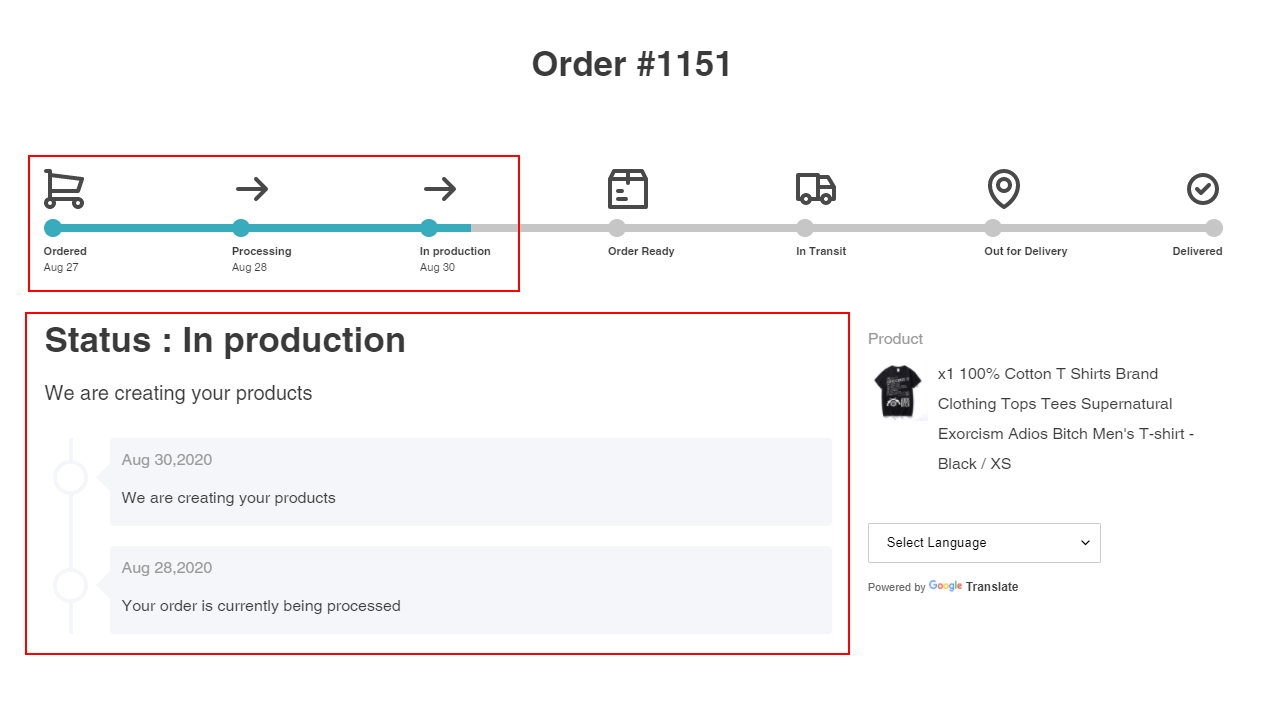
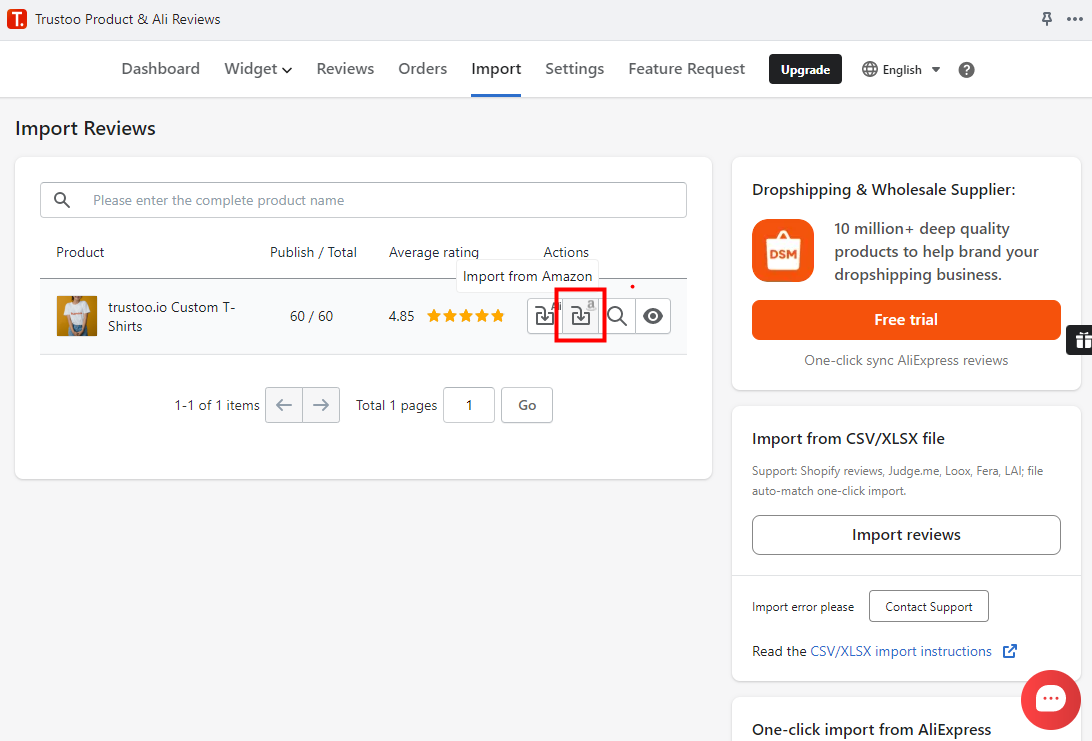
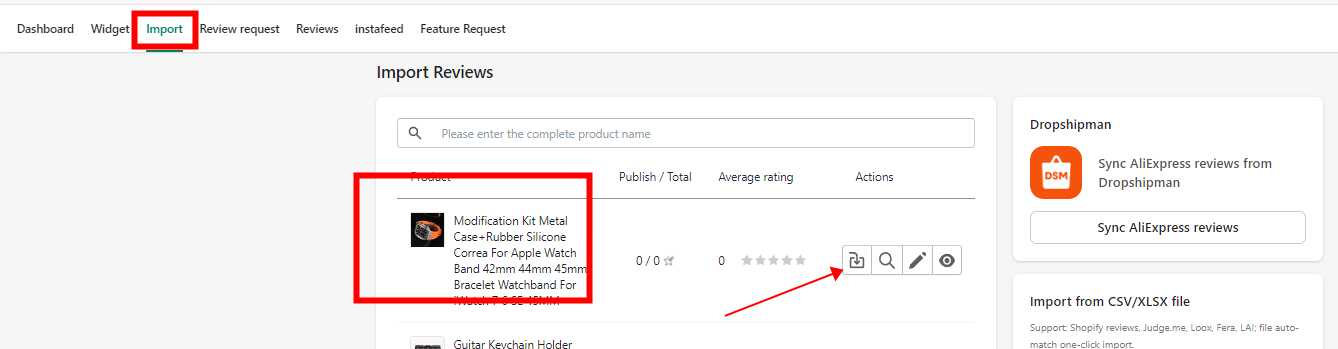
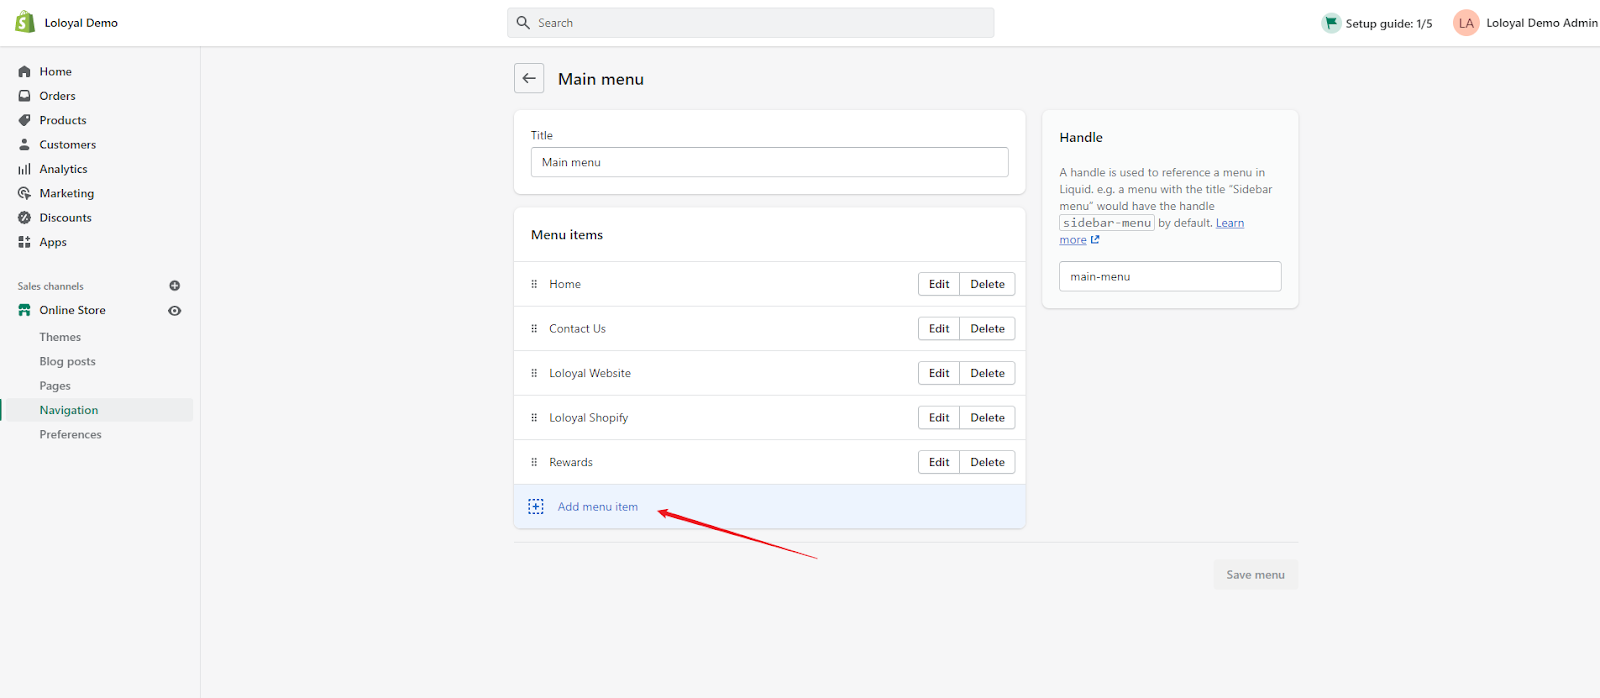
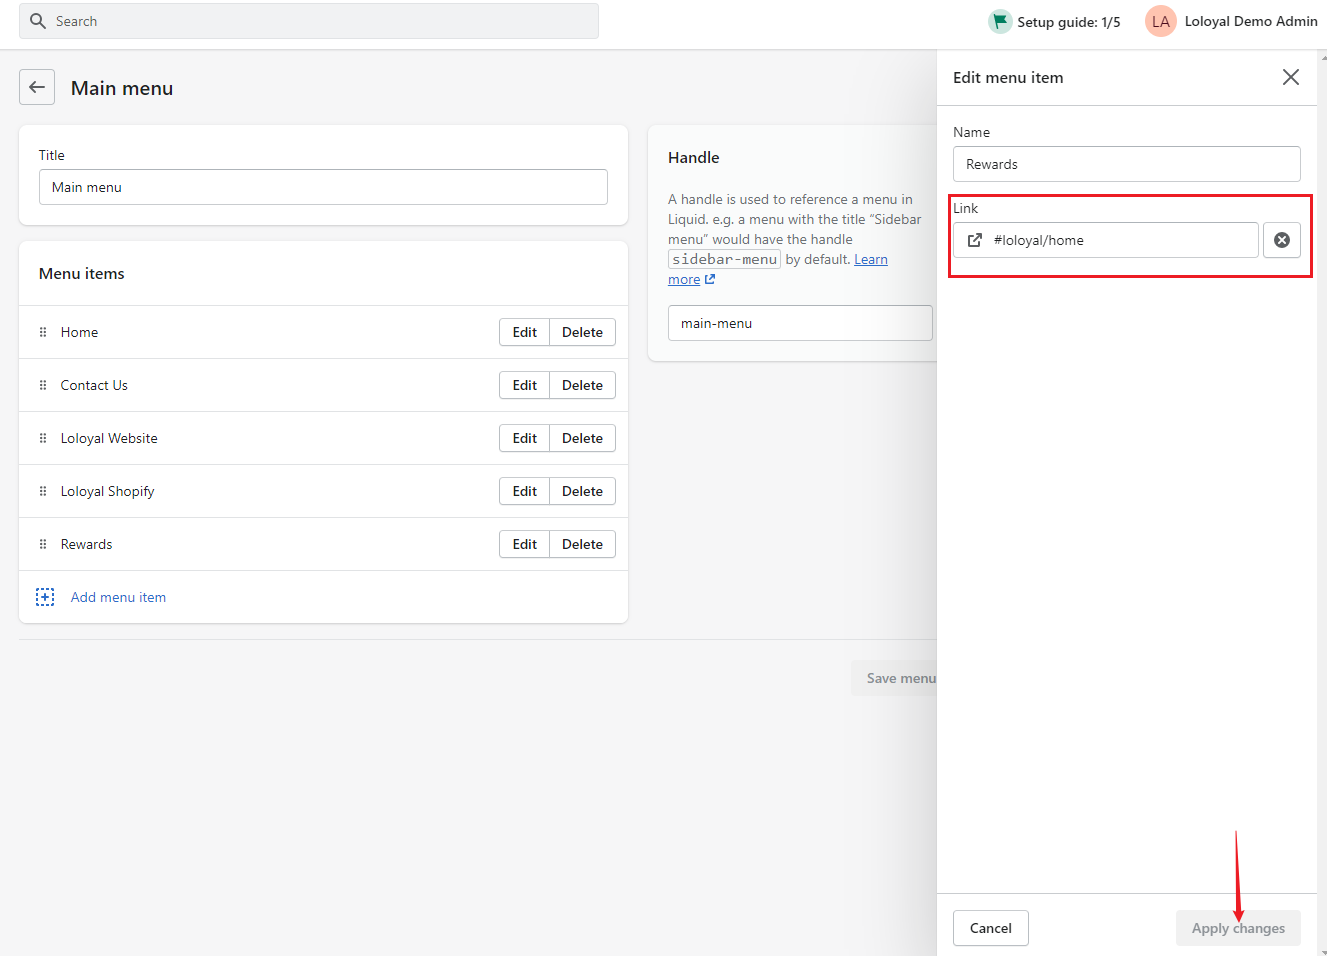
Go to the Trustoo Import section, find the product where you want to import reviews, and then click the “import” icon.

Step 3:
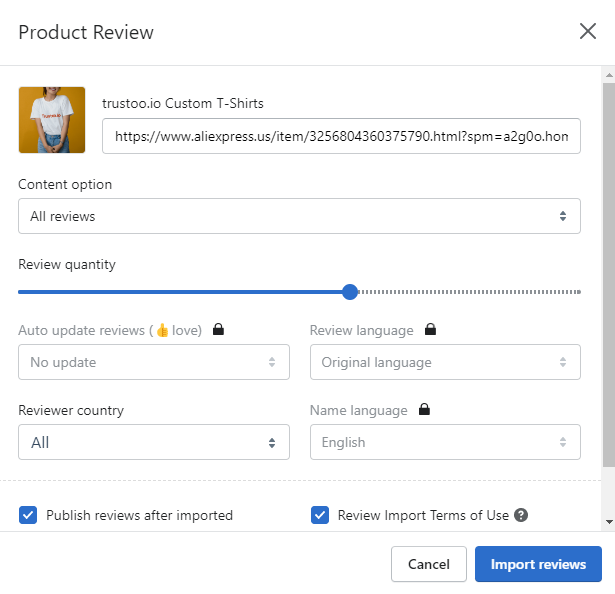
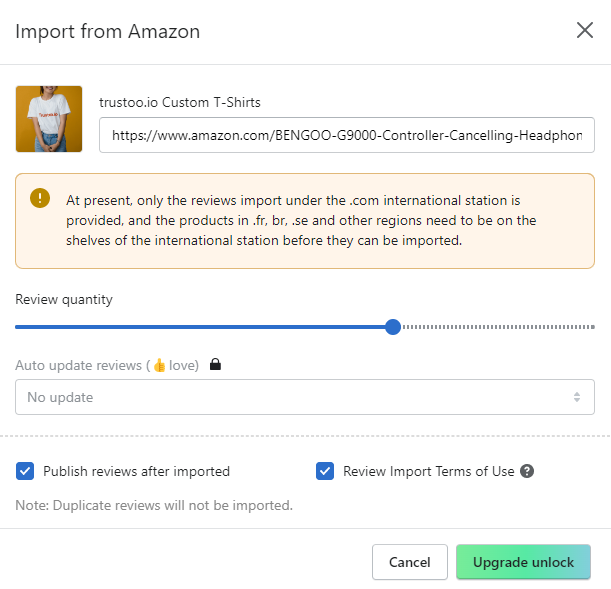
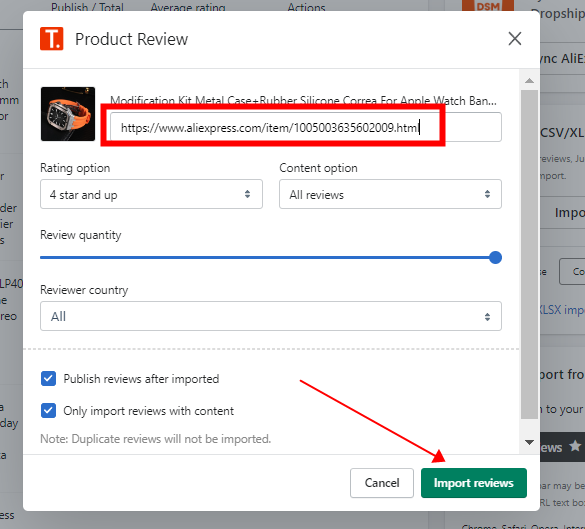
Paste the URL, apply filters, and click the Import reviews button.

You can modify more options,
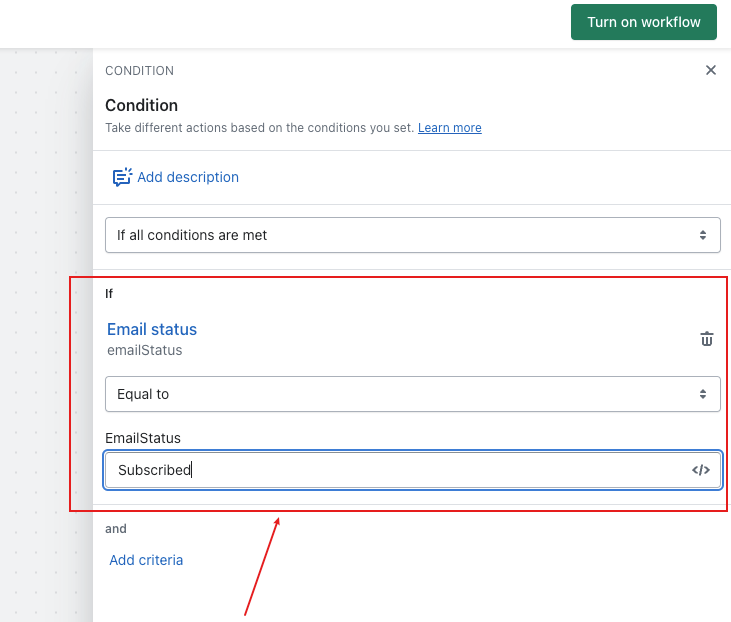
Rating option: To comply with Shopify's relevant policies, rating filtering cannot be selected during import.
Content option: You can filter the comment content and select all comments/text comments/image comments.
Review quantity: Decide how many reviews you want to import at once. It will be set to 20 by default, but you can change it and go a maximum up to 50.
Review country: This option can select the reviews of the corresponding country. After the review is imported, you can also modify the country of the review.
Auto update reviews (9.99 Plan): Record the AliExpress address URL you imported last time, and automatically grab the latest reviews after a certain period.
Review language: Import reviews in the corresponding language according to the language you choose, instead of the default language.
Name language: According to the language you choose, import reviews corresponding to the reviewer's language.
Once you set all the fields according to your preference, tap on the 'Import reviews' button.
Note: Import and use comments, please abide by local laws and policies
Upon clicking the 'Import' button, one pop-up window will appear indicating about the importing process. Make sure you don't close this window as it terminate the importing process.
Method 2: Import Reviews through Bookmarks (Old Version)
Enable the bookmark bar:
For Chrome, Safari, and Opera browsers:
Windows: Press Ctrl + Shift + B keys
macOS: Press Cmd + Shift + B keys
For the Chrome browser, you can also try:
Open Chrome > Click on the three dots at the top right corner > Bookmarks > Show Bookmarks Bar.
For Firefox:
Windows: Press Ctrl + B keys
macOS: Press Cmd + B keys
Step 1:
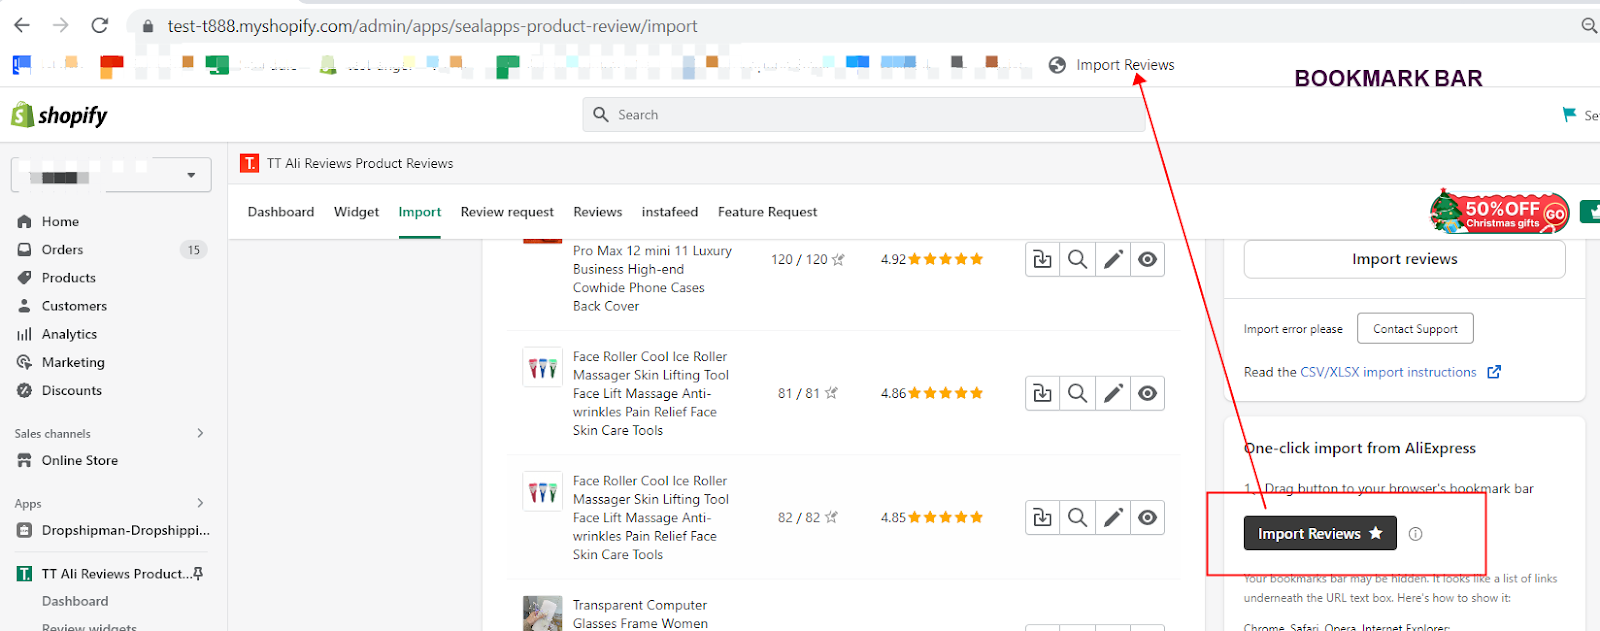
Go to the Import section and drag the "Import reviews" button to your bookmark.
To keep your data safe, please do not share the "import reviews" button with others or install it on a public computer.
Step 2:
Go to AliExpress and find the product with reviews you want to import.
Step 3:
Click on the "Import Reviews" button on the bookmark.

Step 4:
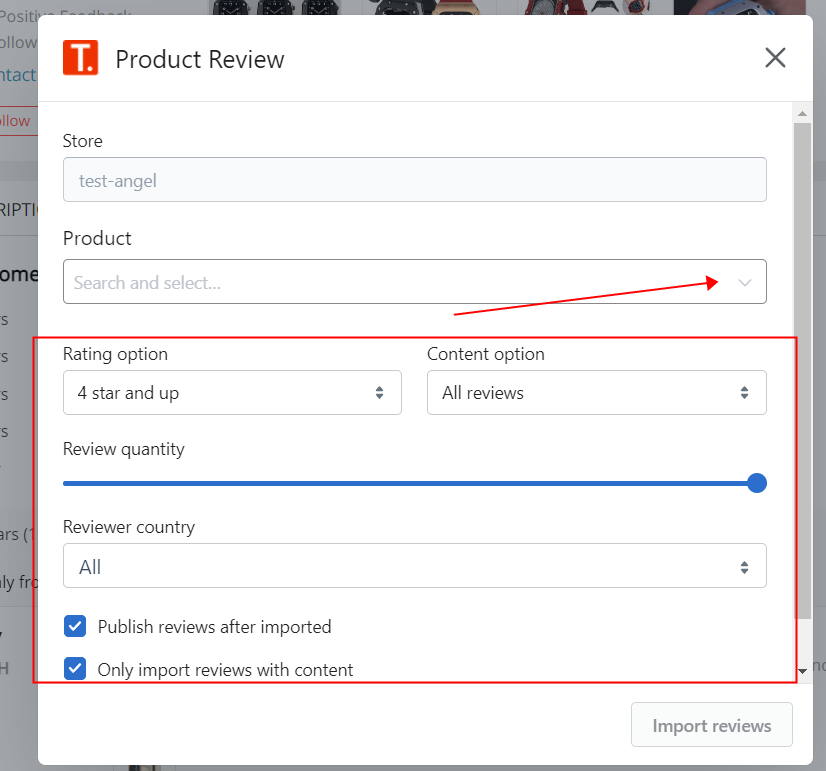
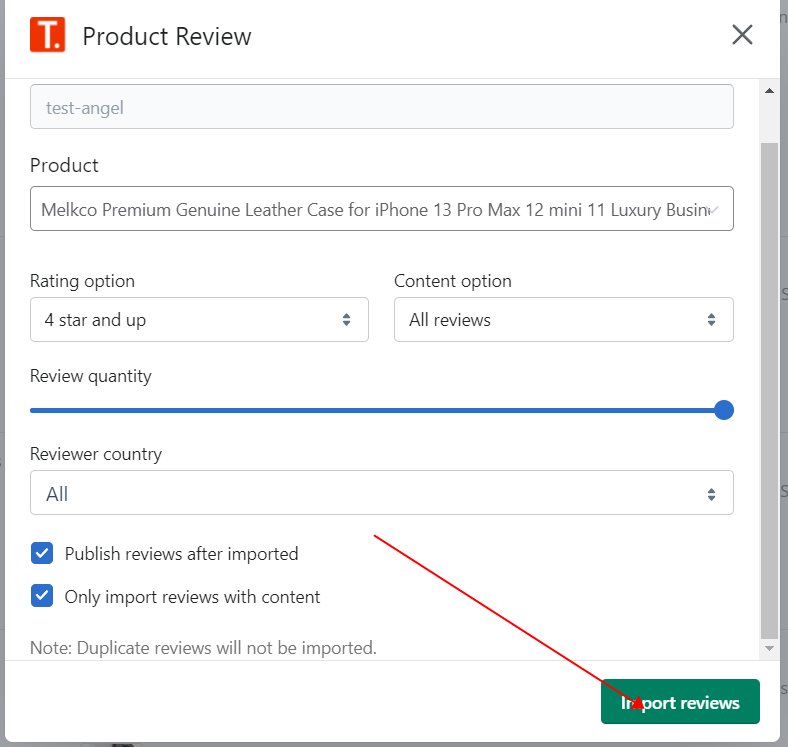
Select the product from your store and apply the filters.
Here are some crucial details explained:
Store: This is the store where you created the bookmark. If you want to change the store, in the new store, drag the button to the bookmark bar of the browser to create a new bookmark.
Product: Choose the product for which you're importing reviews
Rating option: This field will have 5 stars and 4 stars by default so that you can import the best reviews for the selected product. In case you don't mind importing 3-star reviews or lower, enter the value manually. Note that the lowest you can mention is 1 stars
Review quantity: Decide how many reviews you want to import at once. It will be set to 20 by default, but you can change it and go maximum up to 50
Step 5:
Remember to click the Import reviews button.
Upon clicking the 'Import' button, one pop-up window will appear indicating the importing process. Make sure you don't close this window as it terminates the importing process.
Did this answer your questions?
Thank you for your feedback


 the button